In a nutshell
- 🧪 Why it works: baking soda is a mild alkali with gentle abrasion and pH buffering that loosens grime in porous tile grout, especially when paired with hydrogen peroxide for oxidizing lift.
- 🧼 Pro method: Mix a 3:1 paste (baking soda to water or 3% hydrogen peroxide), allow dwell time (10–20 minutes), scrub with a nylon brush, then rinse and dry thoroughly.
- ⚠️ Smart pairings and avoids: Add a drop of dish soap for greasy soils; avoid vinegar, bleach, metal brushes, and risks to natural stone; always patch-test colored grout.
- 🧰 Tools and safety: Use gloves, ventilation, microfiber, a grout brush, mixing cup, and bright task lighting; work in small zones to prevent paste from drying and re-depositing soil.
- 🗓️ Long-term care: Set realistic expectations, consider a penetrating sealer after cleaning, and prioritize regular light touch-ups—because consistency keeps grout brighter longer.
It’s the unglamorous secret behind showroom-bright bathrooms: a humble pantry staple, deployed like a pro. Ask any seasoned housekeeper and they’ll tell you baking soda is the quiet workhorse that coaxes grime from stubborn tile grout. Not with brute force, but with chemistry, patience, and just enough abrasion to matter. When grout darkens, it’s often a stew of body oils, soap scum, tracked-in soil, and mildew clinging to a porous, cement-like matrix. The right method doesn’t just scrub—it lifts. Below, we unpack the technique professionals trust, why it works at a microscopic level, and how to avoid the pitfalls that leave lines still dingy and elbows sore.
Why Baking Soda Works on Grout
Baking soda, or sodium bicarbonate, is a mildly alkaline powder with a fine, soft crystalline structure. That trifecta matters. The alkalinity helps break down acidic soils and body oils. The crystals add a gentle mechanical bite, scouring without gouging the grout’s surface. And because it’s a buffer, baking soda keeps the cleaning solution in a stable pH range where common grime loosens reliably. This is the sweet spot: strong enough to dislodge, safe enough to preserve the grout’s integrity.
Grout, especially sanded cementitious types, is porous. It behaves like a sponge, drawing in residues that typical mopping barely touches. When you lay down a baking soda paste, it clings to vertical joints and nestles into pinhole pores. Given proper dwell time, the paste wicks soils upward, where a nylon brush can flick them free. Professionals love that control: fewer drips, more contact time, predictable results. It’s also friendlier to natural stone adjacent to the joints than many acid cleaners that etch and dull.
Pairing this mild alkali with an oxidizer—often hydrogen peroxide—adds a stain-lifting boost, particularly on organic discoloration. Tiny oxygen bubbles help break apart chromophores that make stains look “set.” The chemistry does the heavy lifting so you don’t have to bear down with damaging pressure. That measured approach preserves grout lines, protects sealers, and keeps surfaces photo-ready longer.
The Step-by-Step Method Pros Swear By
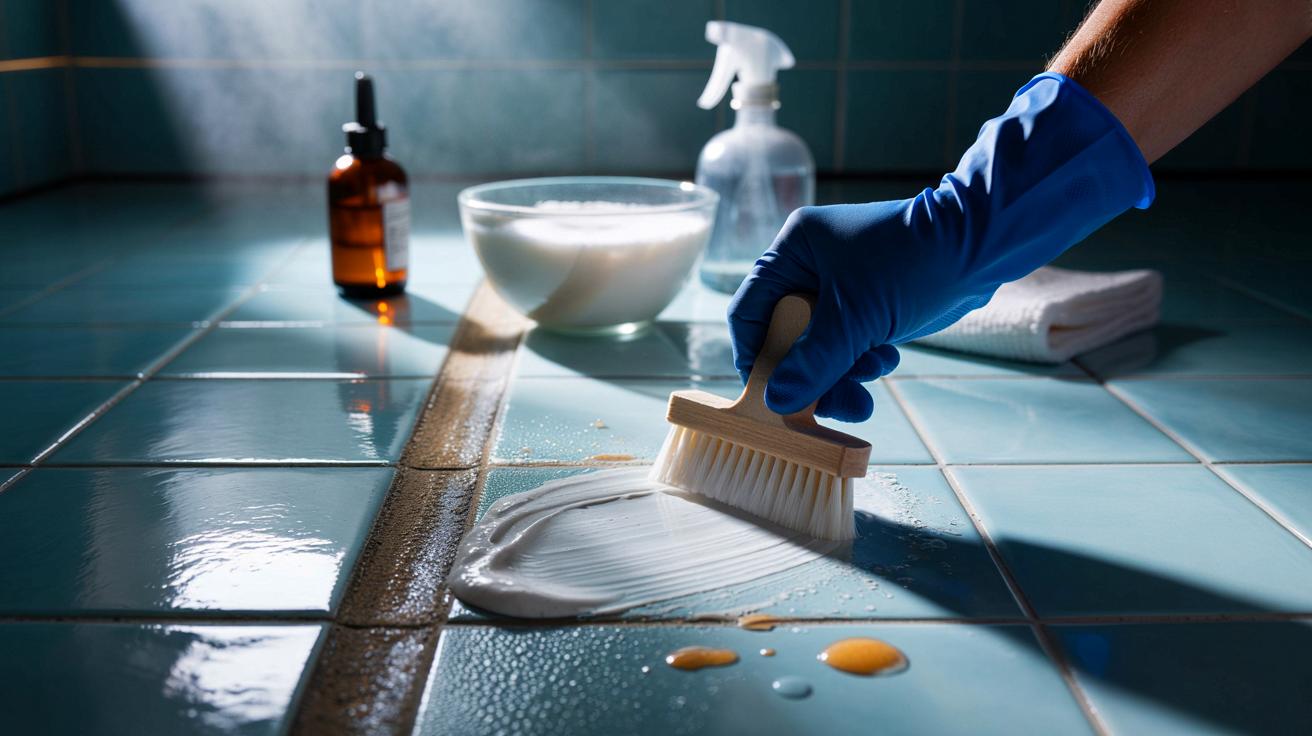
Start with a dry surface. Vacuum or sweep to remove grit that can scratch. Mix a paste: three parts baking soda to one part water for general soil, or swap water for 3% hydrogen peroxide on mildew shadows and organic stains. Stir to something like cake frosting—spreadable, not runny. With a gloved finger or small spatula, butter it onto the grout lines, keeping paste off delicate stone. Then wait. Ten to fifteen minutes is the sweet spot; for stubborn grime, twenty. Dwell time lets chemistry travel into micro-pores, softening the bond between soil and substrate.
Agitate with a nylon grout brush using short, back-and-forth strokes that follow the joint, not across it. You’re guiding loosened soils out, not grinding them in. Mist lightly with warm water if the paste dries. Wipe away slurry with microfiber, rinse, and repeat touch-ups as needed. Work in small zones so paste doesn’t crust over before brushing. For broad floors, a kneeling pad and a headlamp help you see progress and avoid missed lines. Finish with a clean-water rinse to halt residue from re-depositing in the joints. Air-dry thoroughly before traffic—or sealing.
| Mix | Ratio | Best For | Dwell Time | Notes |
|---|---|---|---|---|
| Baking soda + water | 3:1 | General grime, soap film | 10–15 min | Gentle; safe on most grout |
| Baking soda + 3% peroxide | 3:1 | Organic stains, mildew shadow | 10–20 min | Avoid on colored grout until patch-tested |
| Baking soda + drop of dish soap | 3:1 + 1–2 drops | Greasy soils | 8–12 min | Rinse well to prevent residue |
What to Pair With Baking Soda—and What to Avoid
Pros often reach for hydrogen peroxide because it oxidizes and brightens without the fuming bite of chlorine bleach. A small dab of non-moisturizing dish soap can help emulsify oily soils in kitchens. Warm water improves spreadability and slows premature drying. These pairings respect grout’s chemistry and still pack a punch. The goal is synergy, not escalation. If a paste and brush won’t budge a mark, a white melamine pad can assist—used lightly and only on the grout itself.
Skip the classic “baking soda and vinegar volcano” on cementitious grout. The fizz is theatrical, but acids can weaken, etch, or strip sealers, especially around delicate natural stone like marble or travertine. Likewise, avoid metal brushes and overly stiff bristles that scour away sand, leaving rough, dirt-magnet joints. Steam can be helpful but risks driving moisture deeper or softening some sealants; use sparingly and test first. When in doubt, patch-test in a hidden corner and check colorfastness, texture, and sheen before committing. Respect the surface, and your grout will reward you with a longer, cleaner life.
If you’re tempted to spike the mix with bleach, think twice. Sodium hypochlorite can discolor colored grout and corrode nearby metals. On persistent biological staining, use a peroxide-based oxygen cleaner instead, following label directions. Keep mixes simple and controlled; the baking soda paste is your stable base, not a chemistry experiment.
Safety, Tools, and Realistic Expectations
Gloves matter. So does ventilation. Even gentle cleaners can dry skin and irritate airways when used over a large area. Assemble a small kit: baking soda, 3% hydrogen peroxide, a mixing cup, nylon grout brush, microfiber cloths, a spray bottle of clean water, kneeling protection, and a bright task light. Good lighting changes everything; it reveals residual film you might miss under ambient fixtures. Work from the far corner out, and change cloths as they load up—dirty towels redeposit soil.
Temper expectations. A single session can revive lines from gray to crisp, but deeply set rust, dye, or mineral staining may not fully surrender. In those cases, a targeted poultice or a professional-grade alkaline or oxygen cleaner might follow. Once the grout is clean and thoroughly dry, consider applying a penetrating sealer to reduce future absorption and stretch the time between deep cleans. High-traffic baths may need touch-ups monthly; kitchens somewhat less. Photograph a test square before and after—it’s motivating and helps you gauge when maintenance is due. Consistency beats intensity for long-term grout health.
In the end, the baking soda trick isn’t a hack. It’s a restrained system: correct chemistry, mindful dwell time, light agitation, and thorough rinsing. That’s why professionals keep a box in their kit, even alongside pricier bottles. It’s cheap, predictable, and kind to the materials that make a room feel new. Ready to see your grout lines jump a shade lighter without harsh fumes or guesswork—what small test area will you tackle first, and how will you measure your results?
Did you like it?4.6/5 (29)
Just tried the 3:1 baking soda + peroxide paste on our shower grout—holy wow. Fifteen minutes of dwell, a nylon brush, and the slurry wiped clean. Lines popped back to light gray. Total lifesavor for a rental move-out!
Question: for colored grout that’s a shade of taupe, would you still start with water instead of peroxide and extend dwell to 20 minutes, or keep it shorter after a patch test?
Love the science-y breakdown. I almost did the classic baking-soda-and-vinegar volcano, but your warning saved my marble thresholds. I’ll be a tiny bathroom chemist, minus eruptions, plus nylon brushing and good ventillation. Lab goggles optional.
As a building cleaner, I co-sign the dwell time advice. We log 12–18 minutes, brush along the joint, and microfiber immediately. The before/after is reliable, and sealing the next day cuts call-backs by half.
For greasy kitchen grout near the stove, do you prefer a drop of dish soap in the paste or a separate degreaser pre-spray, then soda paste after? Trying not to leave surfactant residue.
This is the first guide that explains why it works, not just how. Bookmarked. I’m setting a quarterly calender reminder and doing small touch-ups weekly—consistency over brute scrubbing. Thanks for the sane, step-by-step approach!
Marble shower question: if paste touches the stone edges, is that still safer than acidic cleaners? I’ll tape the margins, but want to confirm the best practice for natural stone next to sanded grout.
I used a headlamp and a kneeling pad like you suggested and felt hilariously professional. Also discovered the paste was drying too fast—light misting fixed it. My elbows say thank u; the grout lines look crisp again.
Thx for the clear ratios and the “work in small zones” tip—it made all the difference. My bathroom actually looks rental-ready now 🙂
Any tips for those orangey rust-looking marks near a leaky valve? The paste helped a bit. Would an oxygen-based cleaner after the soda step be the next move, or should I try a targeted poultice?
Did a timelapse while cleaning—satisfying! I kept a clean bucket for rinsing micofiber and swapped towels often. Zero gray haze left behind, which used to reappear by morning. Chef’s kiss results.
Game plan for tommorow: vacuum, 3:1 soda+water, 15-min dwel, nylon brush along the joint, rinse, dry, then seal once fully cured. If mildew shadow lingers, repeat with 3% peroxcide. Did I miss anything obvious?